Select an option
Toggle Nav


Search
How to Mail Merge in Design & Print Online
The term "Mail Merge" describes a process which takes data from one source and applies it to another.
By using Mail Merge you can rearrange information into a new format using fields taken from a database at the touch of a few buttons. Importing data is great for address labels, invitations, personalized meeting materials or party bags, and name tags or name badges.
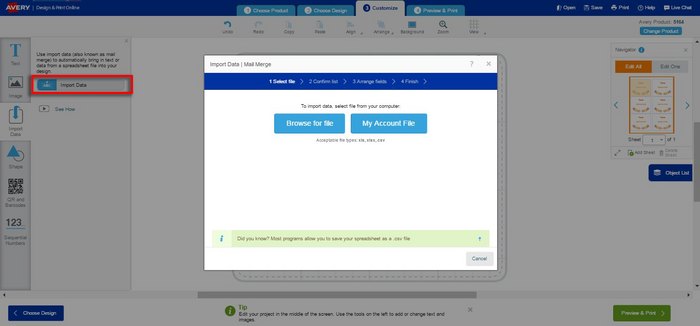
Start by clicking the Import Data button on the left of the Customize screen. The left panel opens up with an option to watch a See How video or to get started by clicking Import Data.
First, select to Browse for file on your computer to open a spreadsheet you’ve previously saved on your computer. You can use xls, xlsx or csv files. If you use Google Drive, you can download your spreadsheet either as an xls or csv file. Most spreadsheet software programs have an option to save as a csv file.
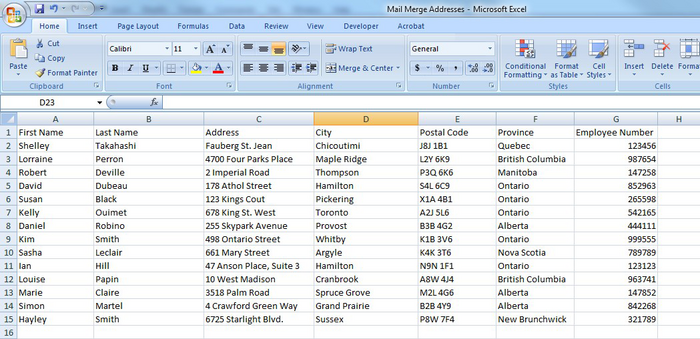
Example of a Microsoft® Excel® Spreadsheet:
Each column represents a merge field. Each row represents one address.
Microsoft Excel workbooks that contain a single spreadsheet are the easiest to import. However, your workbooks may contain two or more spreadsheets. Spreadsheets in a workbook are reordered alphabetically when uploaded. Regardless of the tab order, the tab name that is first alphabetically is used. You can re-name a tab to make it the one that’s used.
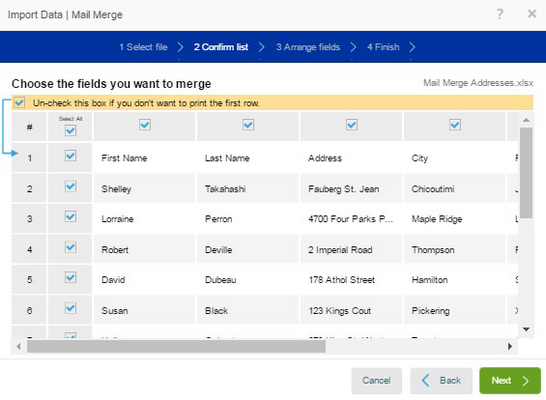
Next you’ll see your data in the Confirm List window. You can uncheck any columns or rows you don’t want to appear. If your list has a header row, un-check the first row so you don’t print a label with your header information on it.
If everything looks right, click the green Next button at the bottom of the window. If you want to go back and select a different list or edit your list, click Back.
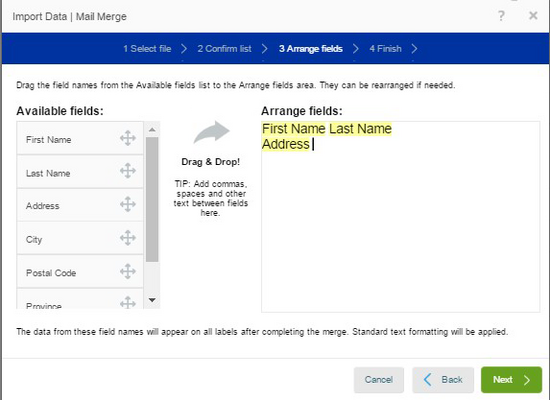
Next you need to arrange the fields that you want to put onto your project.
Each item on the left in the Available Fields area corresponds to a column of data in your spreadsheet. These field names are actually the column headings shown in the previous screen.
Note: Merge fields are not automatically assigned. You will need to insert and arrange the field names.
Select each of the items from the left and drag it to the Arrange fields area. (You can also double-click.)
Add spaces and commas where needed, or use the Enter key to create a new line.
When you are finished inserting the field names, click Next.
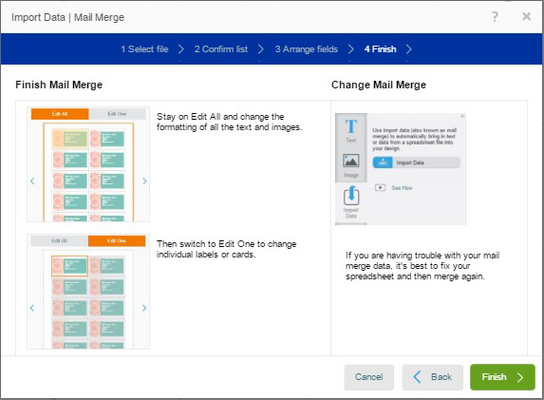
Next, an information screen will appear explaining what you can do next:
Click Finish and you can edit your data on the Customize screen.

Validate your login