A quick look at how to make wavy text using Design & Print Online -our FREE online design tool!
Looking to add some extra fun to your designs when using our Design & Print Online tool? Try adding wavy text to your labels, cards and other projects. Here’s how to do it:
Add a Text Box
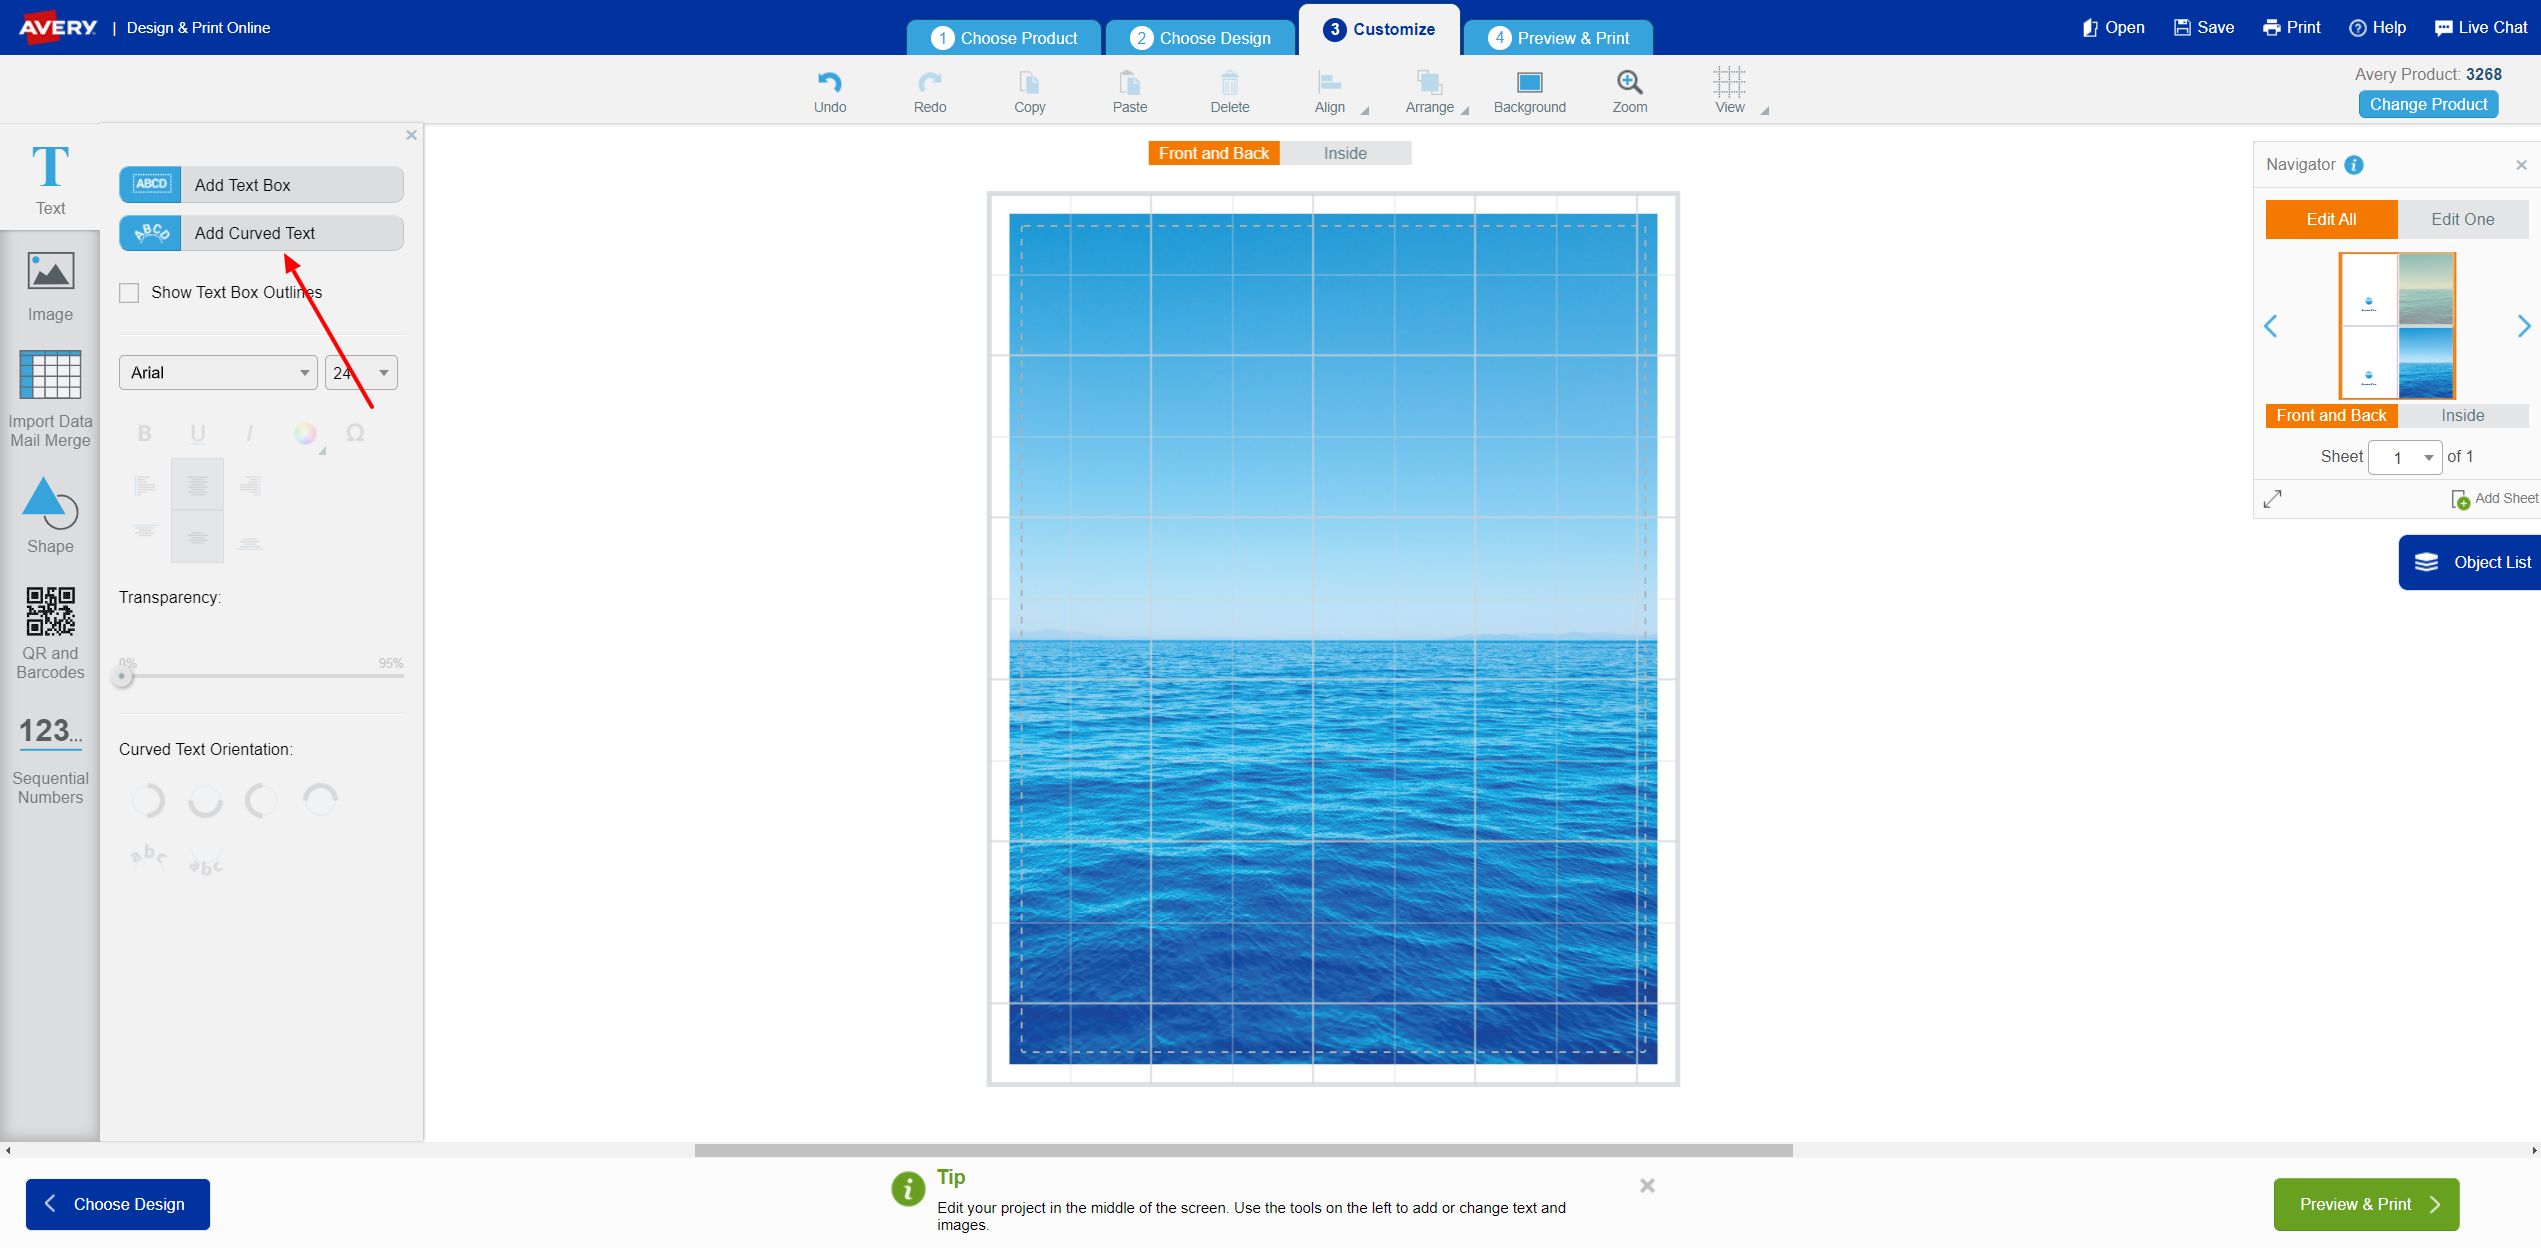
After selecting your product and template your next step is to open up the text menu on the right-hand side. From here, select Add Curved Text to add a curved text box to your project.
Customize Your Text
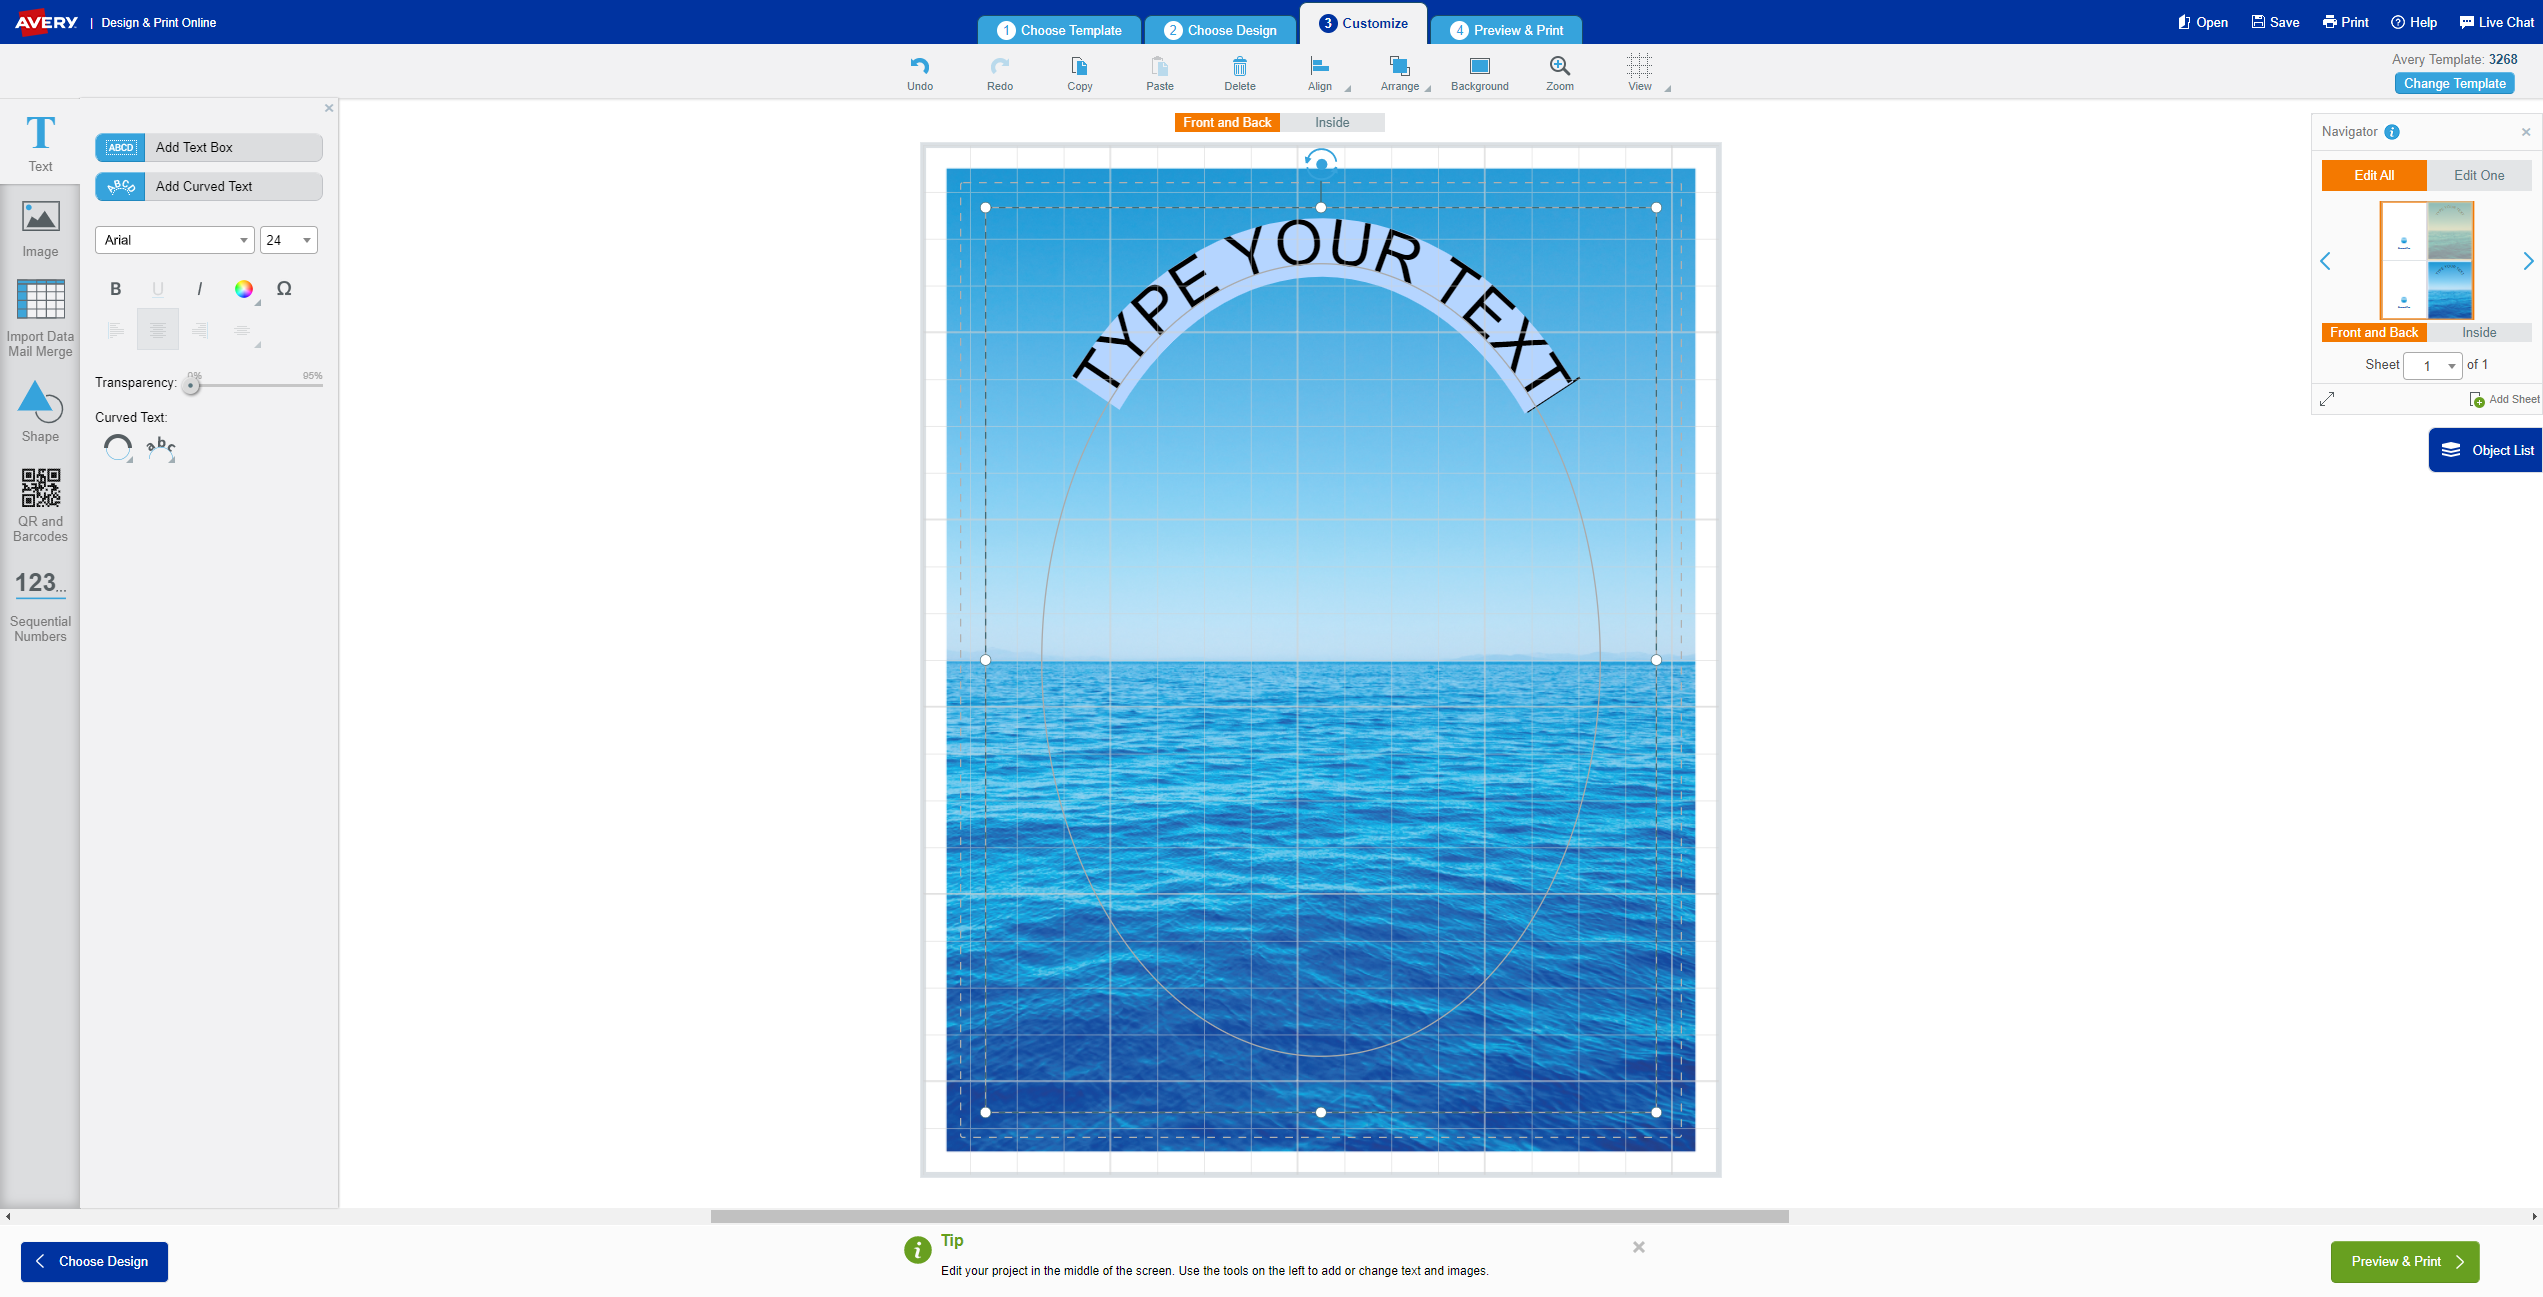
Type your message, change the colour and the font size to suit your project. Note: you’ll want to make the text slightly smaller than you might initially think, since your wave will take up a bit more space than a straight line.
Change the Curve

In order to create a wave that fits the width of your project, you’ll need to reduce the arc of your text. Don’t worry, this is really, really easy to do! Simply place your cursor over the middle white dot at the top of your text box and pull down. This will allow you to add as much or as little curve to your text as you’d like.
Optional: Tilt Your Curve
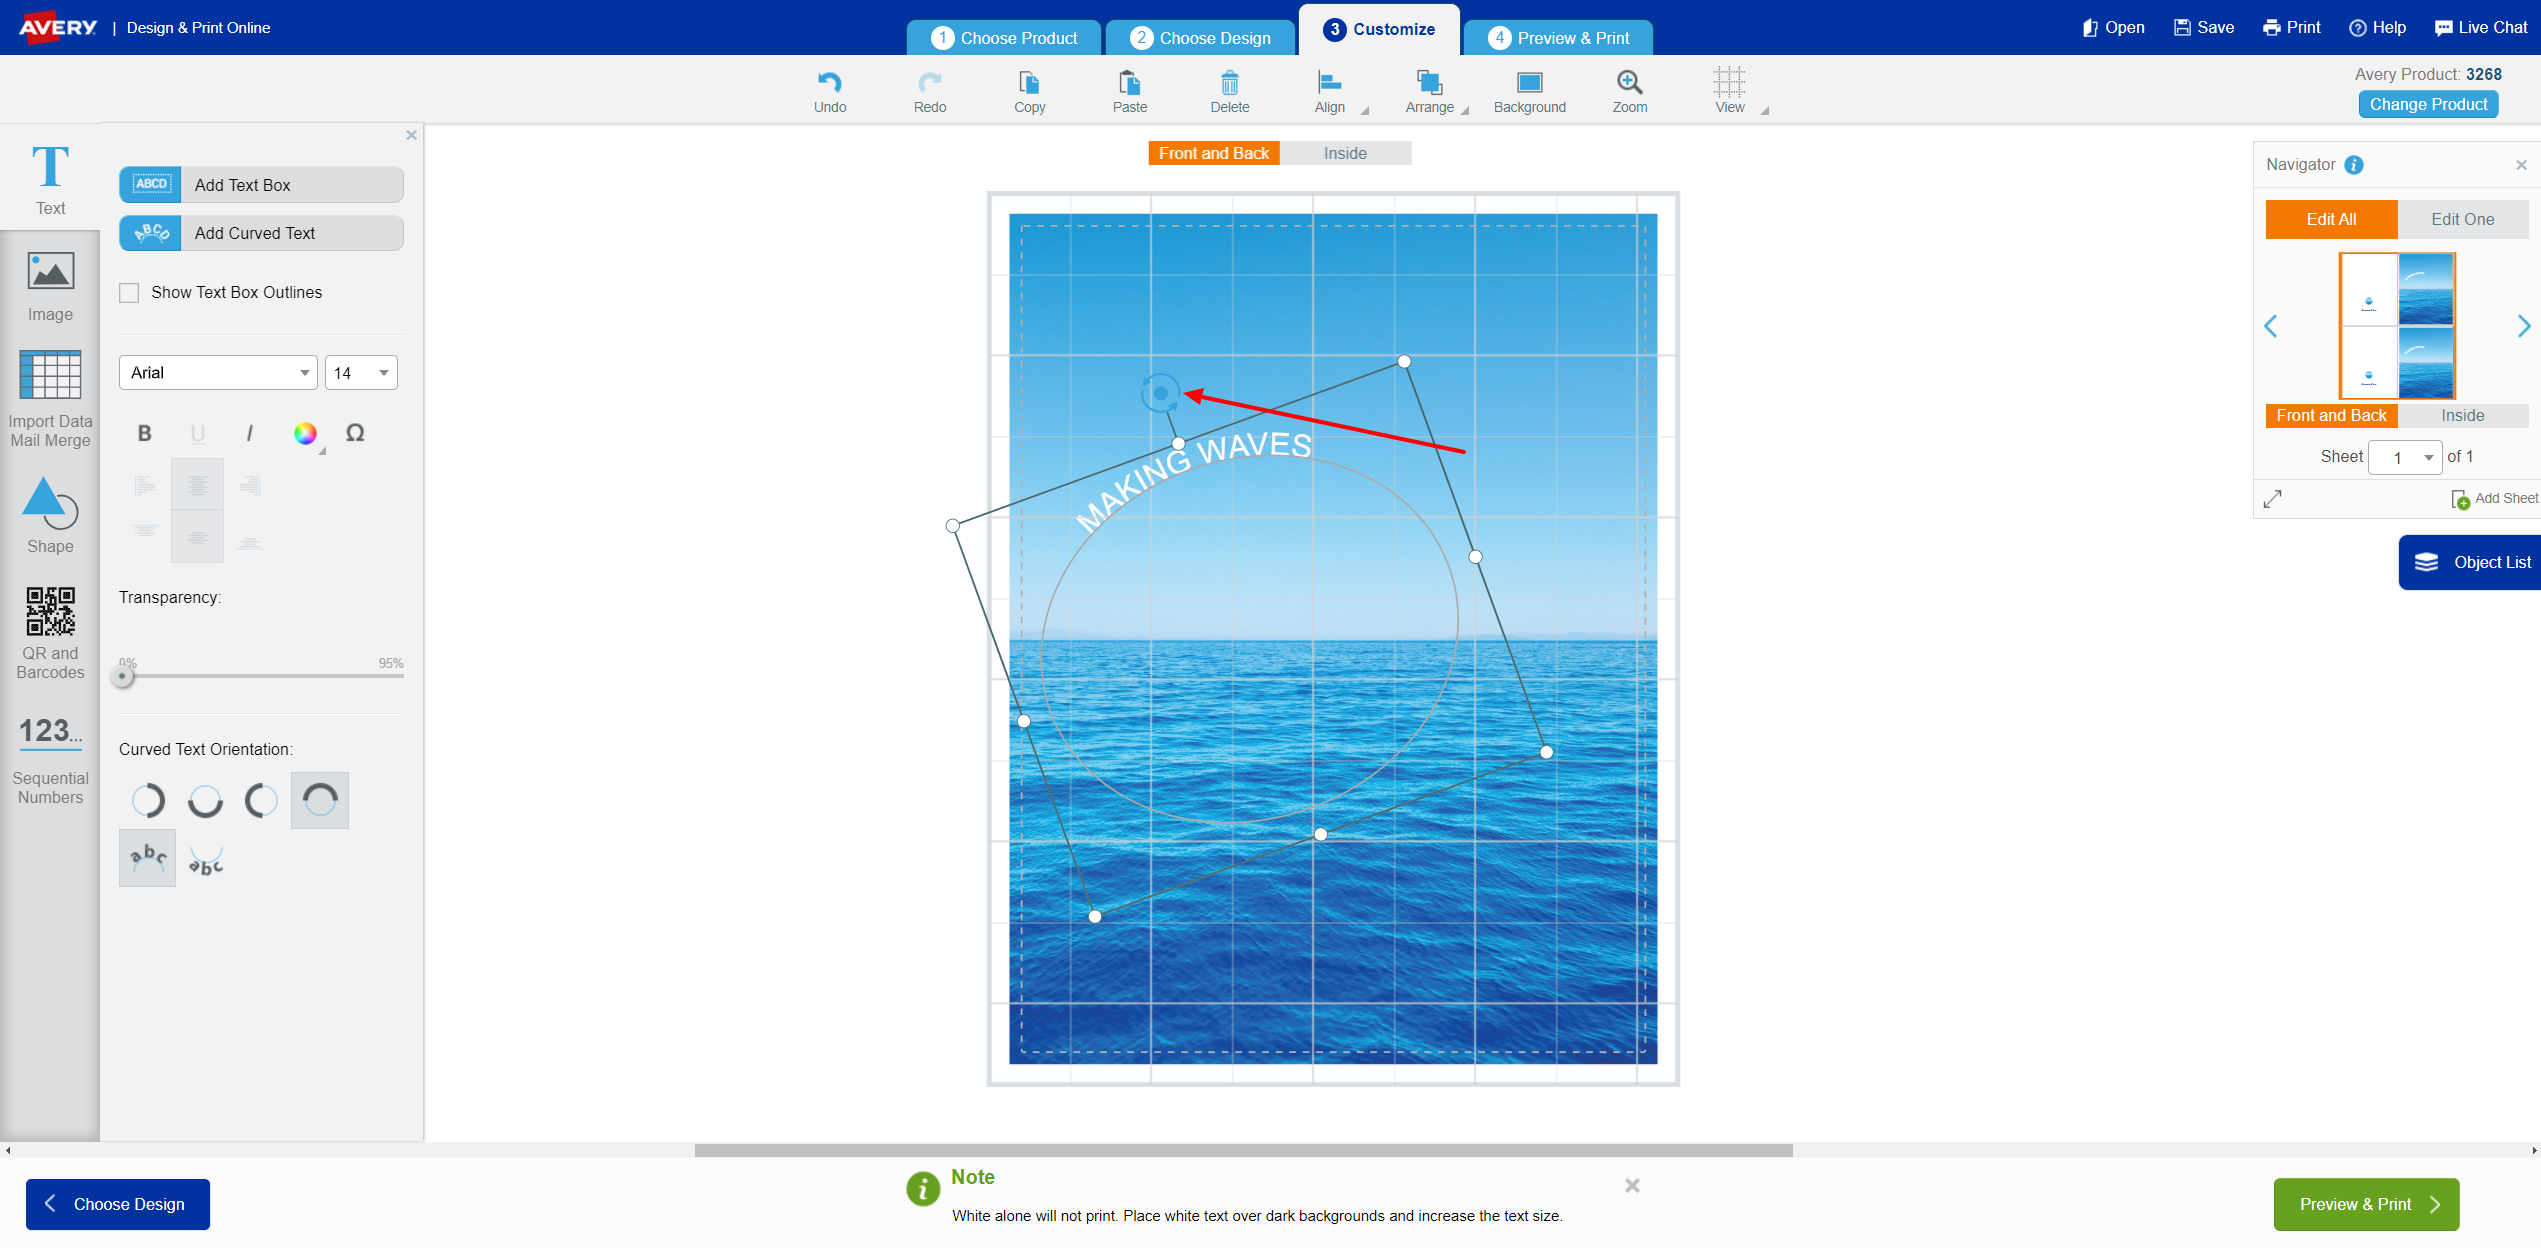
If you wish to angle your curve, use the rotate handle at the top or your text box and turn it in your chosen direction.
Create a Second Curve
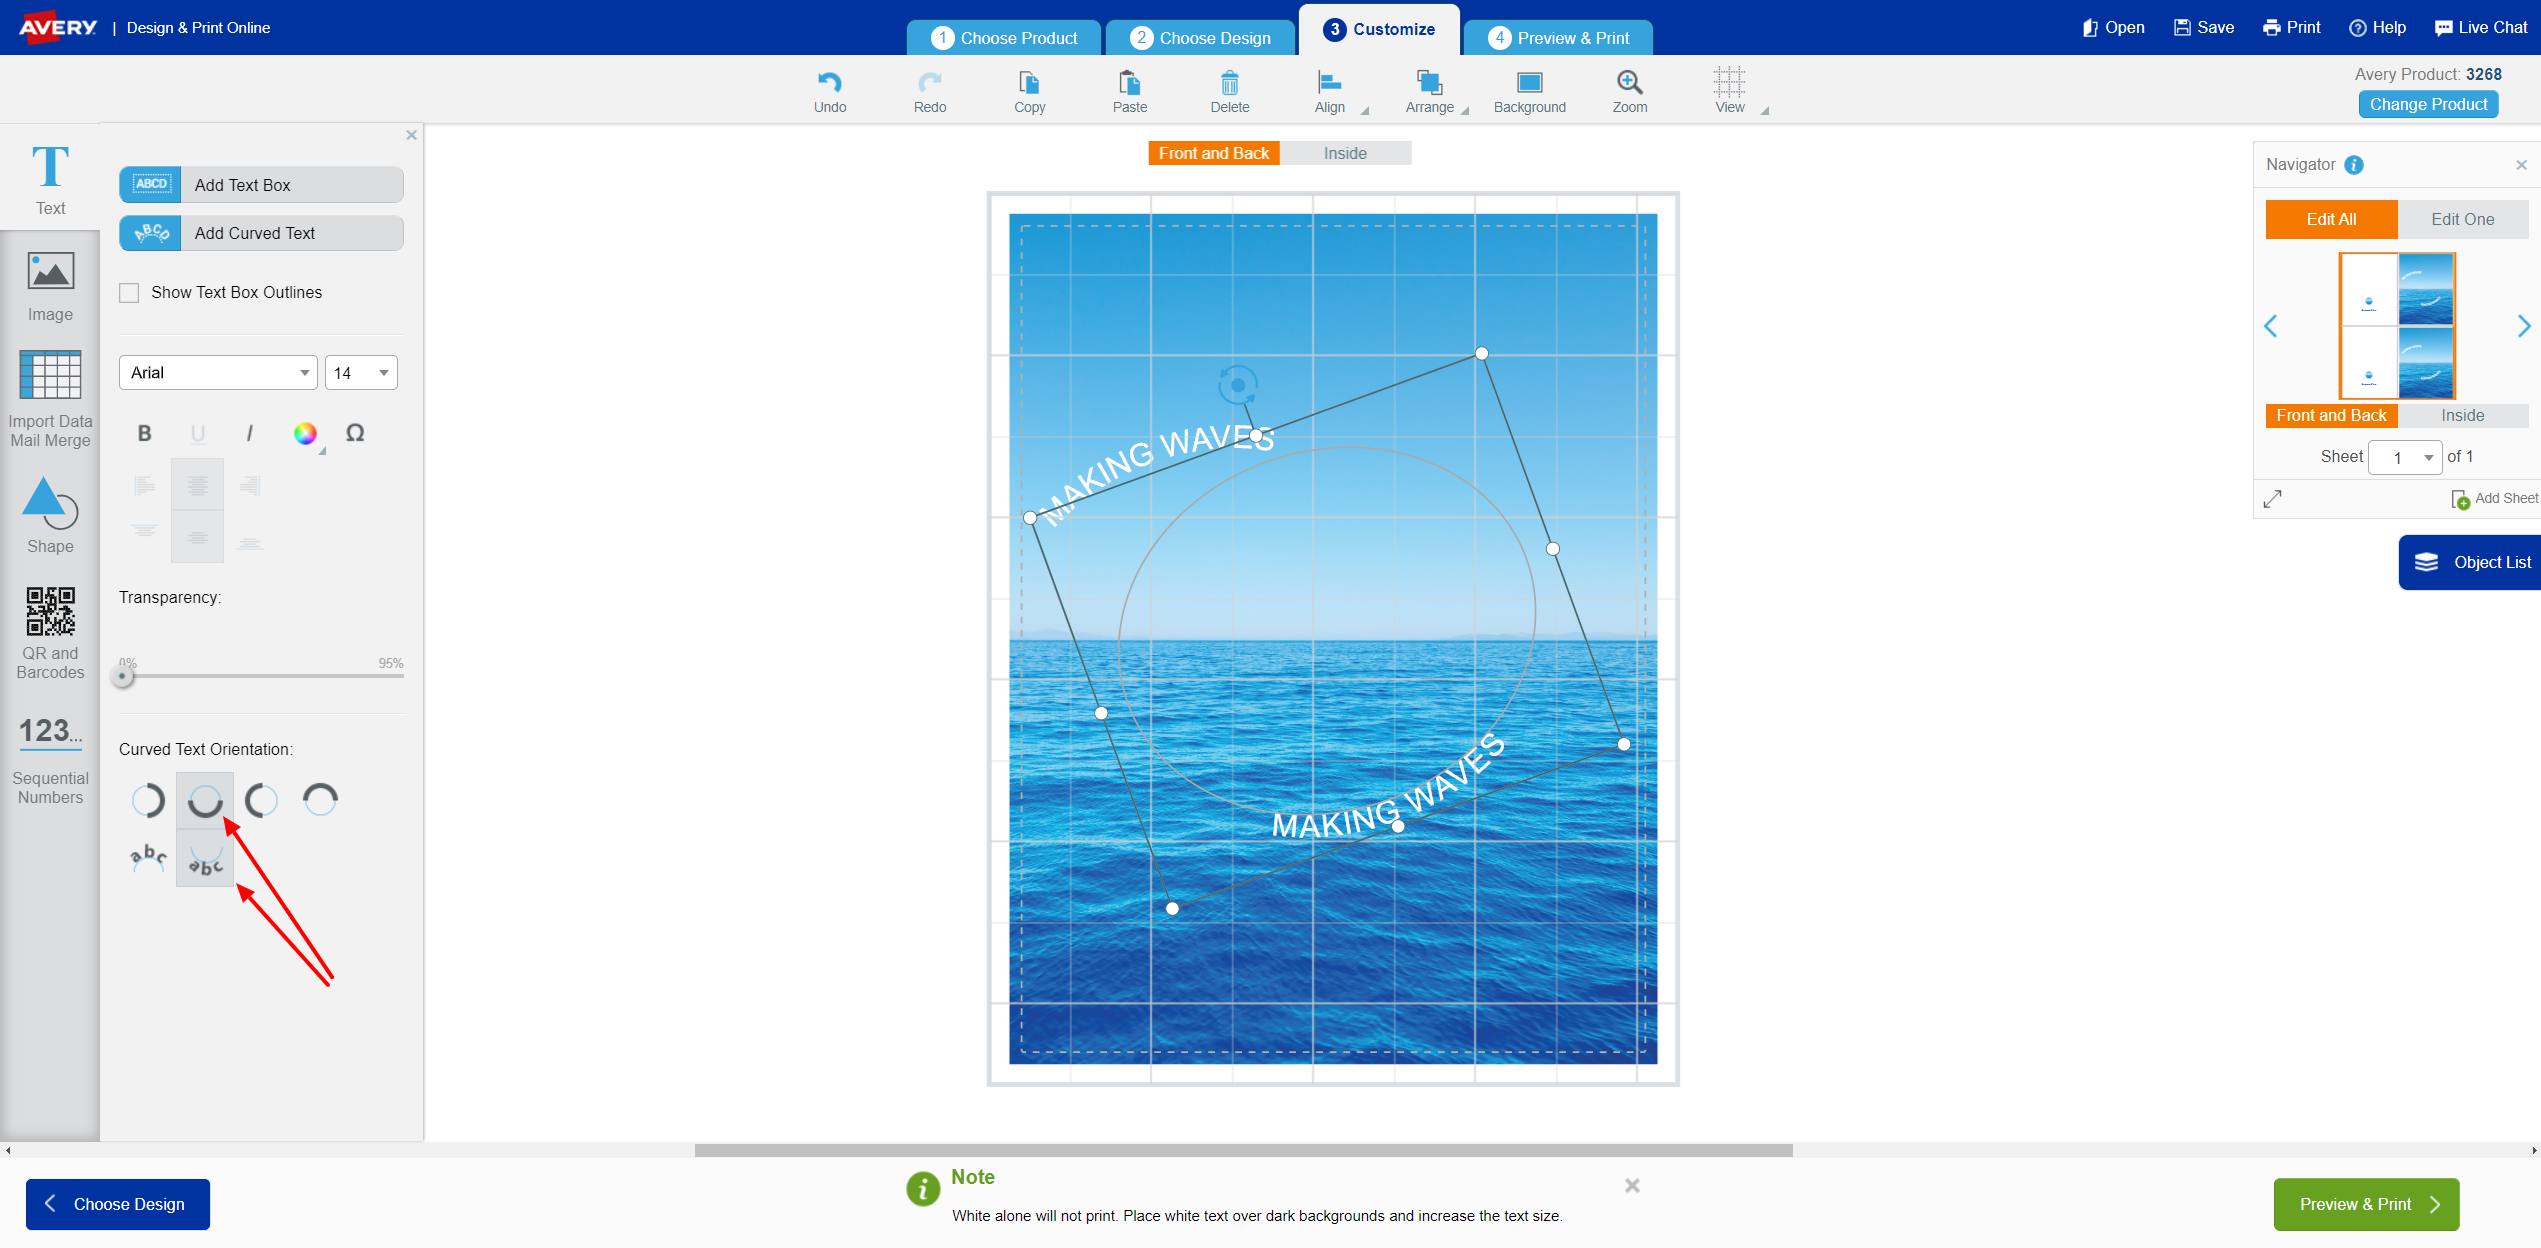
To create the second half of your wave, copy and paste your existing text box. Next, select this new text box and change the Curved Text Orientation to place the text at the bottom inside of the curve.
Make Your Wave
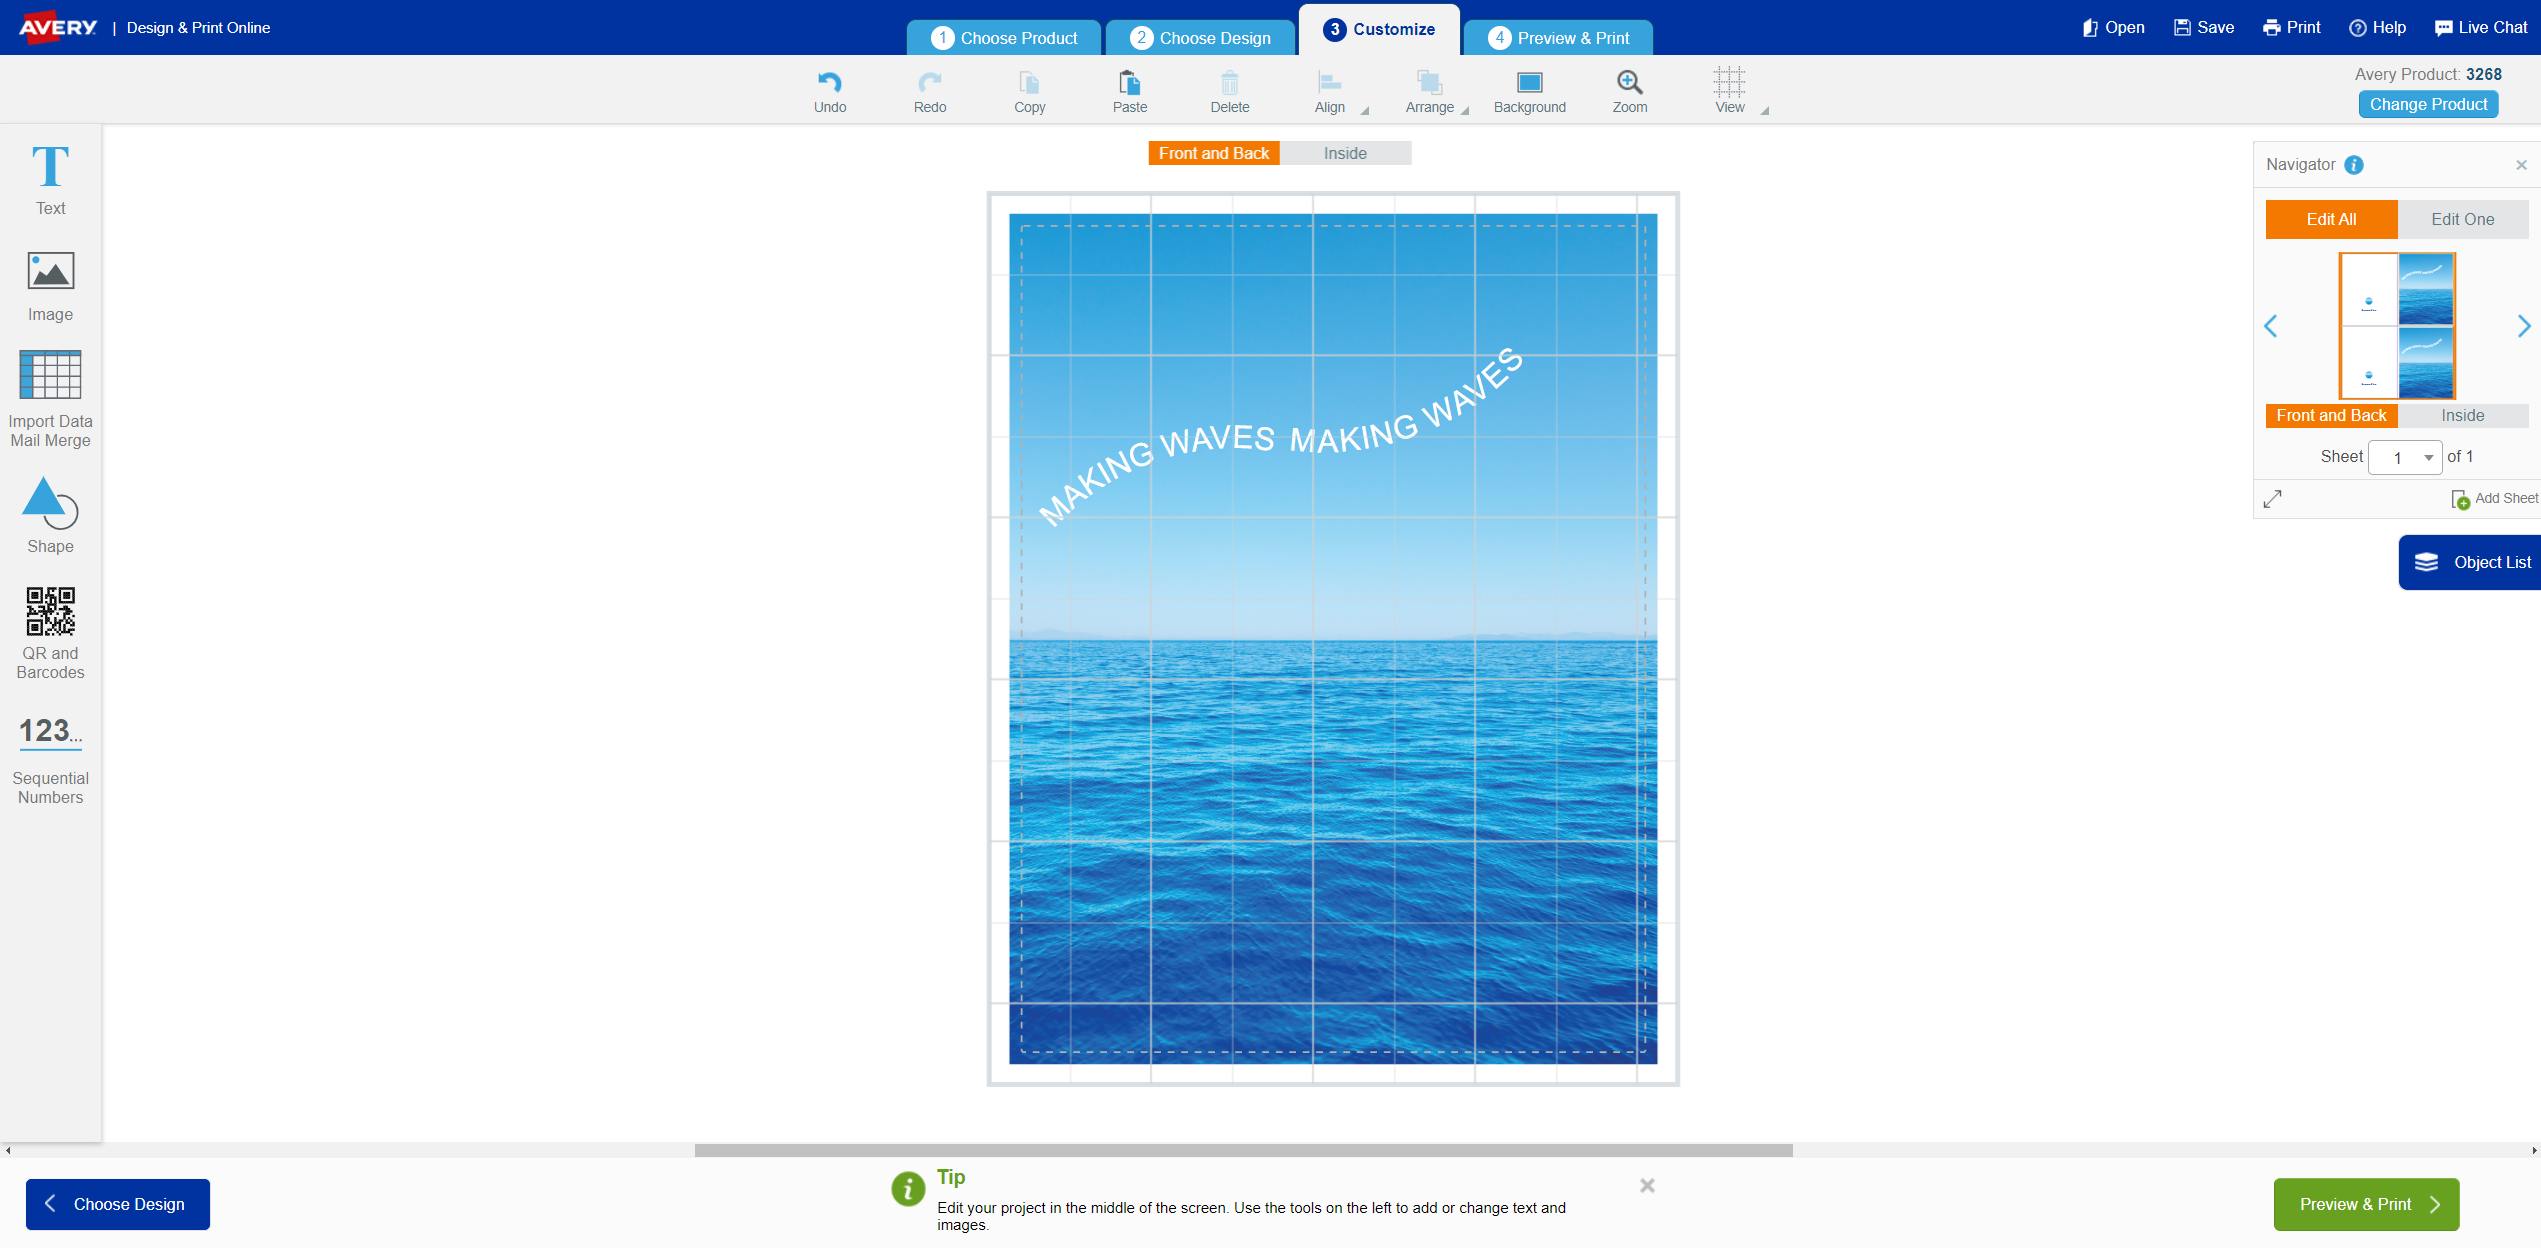
All that’s left for you to do is to drag the second curve into place beside your first curve, and edit the text as needed. Now, you’re making wave. Have fun creating!
Get inspired! Let Avery.ca help you create, organize, plan, and get down to business with innovative ideas, hundreds of free templates, a wide selection of products and high-quality printing services.


Validate your login