You’ve just finished creating the perfect label design. The colours are perfect, the design is compelling, and all of the information is correct. However, don’t hit print just yet!
There are three essential things you will need to check before taking your creation from on-screen to in-hand. Here is what you need to look out for prior to printing your labels.
Check Your Label Package

Print-to-the-Edge Compatibility
The first detail that you will need to verify before printing your labels actually happens away from your computer. If you intend for your design to fill the entire space all the way to the edge, with no border, you need to check your packaging to verify that the labels or cards are Print-to-the-Edge Compatible. This will allow what is known as full bleed printing. If your package does not say Print-to-the-Edge, there will be a small white border around your labels.
Label Sheet Size
Some Avery labels are available in a smaller 4” x 6” sheet size. When printing on these smaller sheets you will need to adjust your printer settings to accommodate the different size.
To change your settings, begin by clicking Print. Next, access the Paper Size setting in your printer dialog box. Alternatively, you may need to look in Properties, Preferences, or Advanced Settings. Please note that not all printers support 4" x 6" or custom paper sizes. If you cannot find the option to print 4" x 6", please contact your printer manufacturer for further assistance.
To learn more about printing on 4” x 6” sheet, see https://www.avery.ca/4x6.
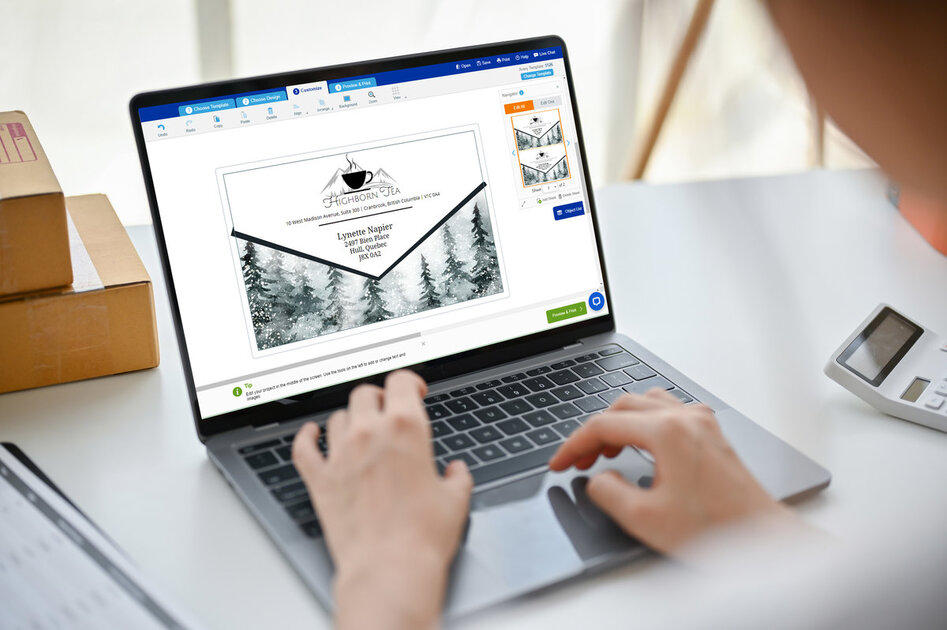
Check Your Design Layout

The printable area of a label is split into three sections: safety, trim, and bleed. Safety is the area guaranteed to print on the label, trim is the physical border of the label, and bleed is the extra design space outside the trim used by designs that extend to the edge.
Prior to printing your label, please verify that all essential components of your design, including messaging and art are within the printable areas. This can be done onscreen using the Avery Design & Print Online tool.
Check Your Printer Settings
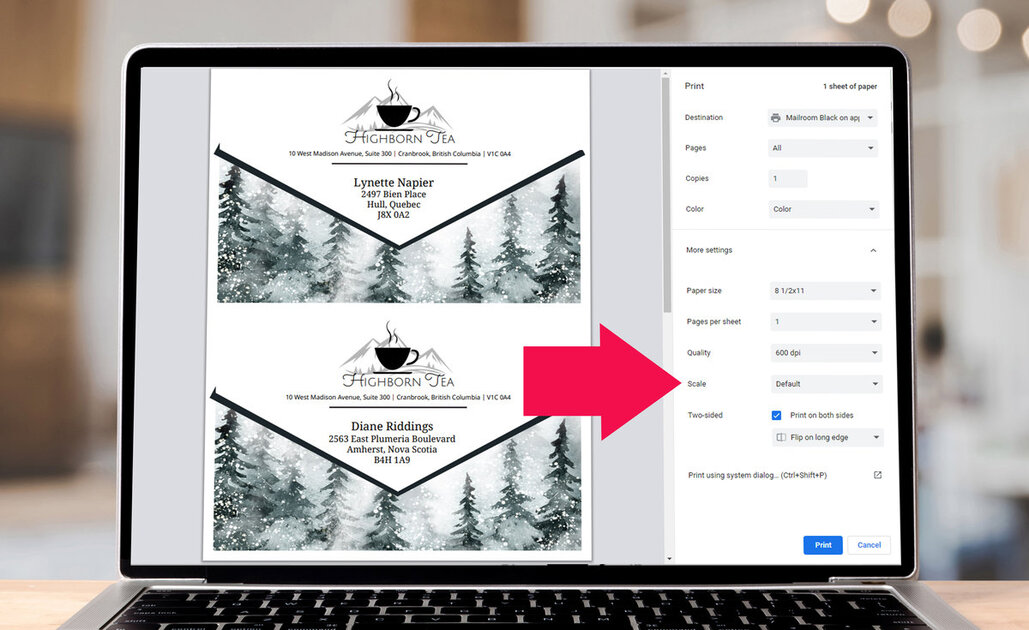
The final two areas to check prior to printing your labels reside with the settings menu of your printer. Since all printers are different, please ensure that you are familiar with the settings layout in your specific machine.
Paper Type
Label sheets and card stock require different printer settings than plain printer paper. Sheets of labels, cardstock, thick paper, etc. have different thicknesses. When you adjust your paper type in settings, it tells your printer to change the speed that the sheets are fed through your printer. This adjustment is an important step, because it can help prevent the occurrence of paper jams.
Scale Settings
The page scaling setting should always be set to 100% or “actual size.” Never use the “fit to the page” option. “Fit to page” will cause your design to shrink to the wrong size and result in misalignment.
Avery Products Canada offers a wide selection of labels available in different shapes, sizes and materials. To browse our label options and to learn more about the different available materials, visit https://www.avery.ca/en/products/labels.html. For professionally printed labels, visit https://www.avery.ca/en/customprint.

Validate your login